An opinionated tour of RStudio
Welcome to the first lesson of Basic Basics! Here at R-Ladies Sydney, we’re a pretty opinionated bunch. In this lesson, we’re going to impart our opinions1 on navigating RStudio and setting up your workflow. This forms the foundation of all future RYouWithMe lessons - so be sure to follow along carefully!
Lesson Outcomes
By the end of the lesson, you should:
- Have R and RStudio installed on your machine
- Know your way around RStudio
- Know how to create a Project file and a script in RStudio
- Understand the idea of a working directory and where your RYouWithMe files live
- Understand what happens in the “four quadrants” of RStudio
- Have adjusted your settings to make your RStudio life a little less painful (trust us on this one!)
Install R and RStudio
The first step is pretty straightforward. First, install R then install RStudio.
This playlist of how-to videos from the amazing Danielle Navarro might be useful if you run into install drama on a Mac, PC, or Ubuntu machine.
For this lesson (and likely the rest of RYouWithMe), we’ll be using R v.3.5.1 (2018-07-02) – “Feather Spray” and RStudio Version 1.1.463. So, if you already had R and/or RStudio installed, best to check for version updates! It probably won’t make that much of a difference if you have an older version, but very occasionally it does matter. Also, note that our screenshots and screencasts will be use a Mac, but the instructions should broadly apply to PC users!
Wow time flies when you are having fun with R!
The RYouWithMe course was written WAY back in 2018, but all the code still works with newer versions of R and RStudio, and updated tidyverse packages. We last checked the code in February 2025, using R version 4.4.2 (2024-10-31) - “Pile of Leaves” and RStudio version 2024.12.0.467.
Not sure which version of R or RStudio you have? This 90 second video from Lisa Lendaway shows you how to check which version you are working with.
Creating files and a tour of the studio
In this screencast, we’ll review:
- The overall layout of the default RStudio interface
- How to create a project and organise your files
- How to create a script
- The four main quadrants of the RStudio interface and what you can expect to do in each.
Your turn
Watch the video and then carry out the following steps:
- Create a new project and save it to an “RYouWithMe”” folder somewhere you’ll be able to access it again. This can be your Desktop, in Dropbox, or anywhere else sensible. You’ll be coming back to this for all your RYouWithMe lessons - so just be sure to remember where you put it!
- Create a “scripts” and “data” folder within that folder.
- Play around with expanding and reducing the components of the interface.
- Create a script file and save it (to your scripts folder within RYouWithMe of course!)
For quick reference, here’s a screenshot of the quadrants and a brief explanation
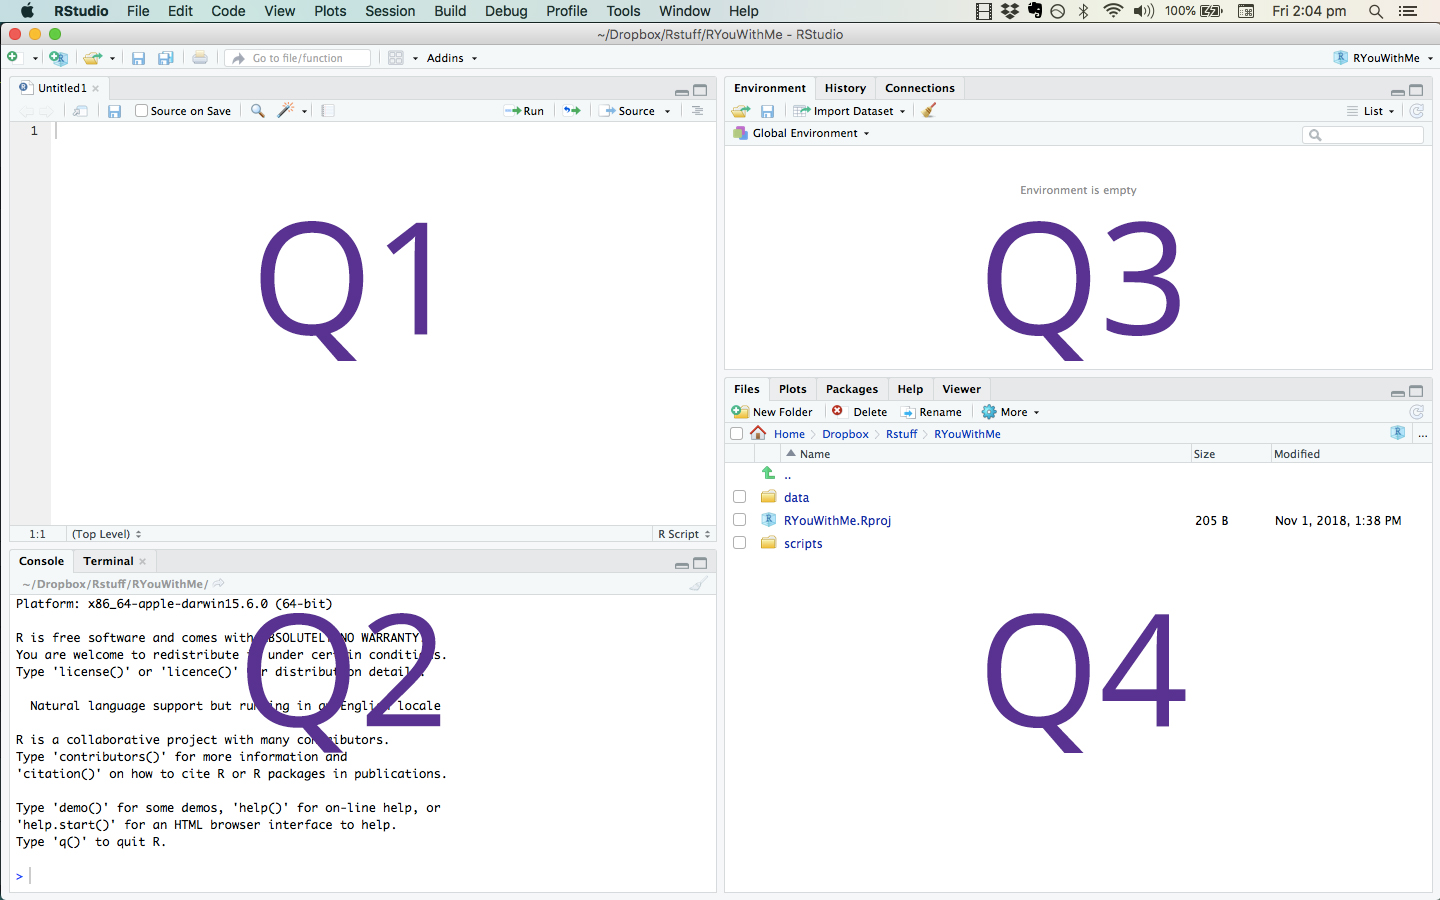
- Q1 - contains: script, data, command to run script
- Q2 - contains: console
- Q3 - contains: environment
- Q4 - contains: files, plots, packages, help
Settings
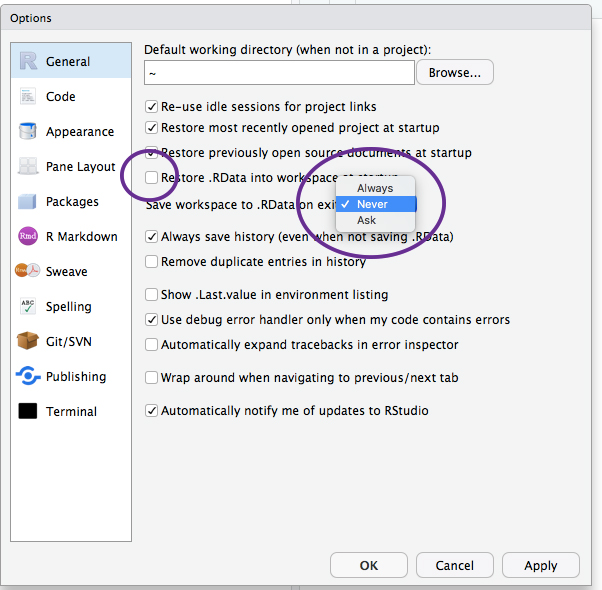
Some people like Rstudio to remember stuff from session to session. We think this is dangerous. So to avoid future hassle, we recommend that you change two settings.
Locate Preferences (on Mac, this is in the RStudio menu). In the General tab, uncheck “Restore .RData…” and select “never” for “Save workspace…”
Tada!
Footnotes
Because these are opinions, you can probably find people who disagree. To each her own and all that!↩︎